Monday, April 25, 2011

Week 12- The Final Lab

This week was the last week in the lab. The hardware and software had to be presented whether or not it was fully working. Luckily enough, I just had the software to complete. Having had a week to reflect on the software, I set about completing it to work.

I had a good idea what was wrong from last week, so I knew what I had to change, the difficulty was to change it correctly. But after a weeks reflection, I was quickly able to fix these errors. It's amazing what a short break can do for you. I soon had a fully working board and software. The software was now successfully reading in all the switches and it was reading in and decimally outputting and ADC value.

Finally it had all came together. I then went about adjusting the software, adding a simple button just to reset the ADC value on display, changing the colours and switches around, just to make the output more presentable. I also added a picture of the actual hardware. Attached below is a couple of screen shots of the software.

All in all, I was happy with the results. After 12 weeks I had fully working hardware and software. I demonstrated these to the supervisor and then handed them over. I now have to look forward to completing a report and presenting my work after the Easter break to the other students.

Screen shots of working software


Sunday, April 10, 2011

Week 11

Continuing on from last week, I wanted to recheck my boards using a functional test. I did the same as I did before with the power to the ICs, the signal generator at 1kHz to produce a square wave, and the oscilloscope to monitor the wave forms. It quickly materialised that the boards were working just fine, so I would have to go  back and assess my software with the annoying Visual Basics.

Going back through the software, I soon realised what my mistake or mistakes were. I knew that to write to the different ports using the visual basics you need different addresses. The addresses weren't the problem. The problems were when writing to the control port bit numbers, some of the pins hardware were inverted and I didn't take that into account, therefore I was sending out the wrong signals. Also, I didn't take into account that when I'm writing to a different bit number on the control port that I didn't reset a previous bit number that I had set. Going by this bases, most of my control port settings seemed to be wrong, so I went about correcting them.

Unfortunately, this wasn't as easy as I thought. Parts of the software were being ANDed and ORed and I was trying to keep an account of what bits were already set and what bits weren't. It didn't help that some pins were inverted. Overall I got caught up in the whole affair and began confusing myself. Frustration sank in and after several attempts of chopping and changing the software, then testing it with the hardware, none of them worked properly. I was getting some response from the software, buy not what I wanted. Some switches would work when others wouldn't.

 After several attempts I took a  breather from the software. At least I knew this week that it wasn't the hardware at fault. So as I took a break from the software and I mounted the hardware together(pic 1). Next week is the final lab, I'll have another crack at the software again and hopefully get it working and have everything completed.
Pic 1) Mounted hardware

Saturday, April 9, 2011

Week 10

This week involved working with the software for the hardware. We're initially given a program to run from a software application called Visual Basics. This program is left uncompleted, so my task is to finish it off and fill in the blanks, so to speak, then hopefully improve on this program. I've dealt with Visual Basics before and have never been a big fan of it. I was given the option to write the software using C programming from scratch, this would involve a lot of unknown territory for me, so I declined that offer and took the Visual Basics package.

I combed through the software, very slowly, trying to gain an understanding of what it was all about. I knew what it had to do, but seeing it in visual basics can be confusing. After some time, and a greater understanding of the task, I was ready to begin completing the program. The purpose of the program was to read and write back and forth from the PC parallel port to the hardware. This involved writing to the correct port, the status, control or data port. It also meant writing to the correct bit number of these ports. Visual basics writes in decimal, this meant finding the right bit number and write to it using the correct decimal number. I filled in the missing parts of the program with what I thought to be the correct code and hooked up my hardware to the PCs parallel port to begin testing the program.

My first problem occurred when after connecting everything together, the PC I was using wasn't set up correctly to use the software I needed. I then had to switch PCs and try again. Unfortunately, it wouldn't of mattered what PC I was using as my software code didn't seem to work the way I needed it to. The program ran fine and was able to read in 14 of my 16 switches correctly. Unfortunately, on switch 16 when pressed, the program, it seemed, would not read any change in it and on switch 15 when pressed it would read a change in both switch 15 and 16. Everything else seemed to work fine. My initial thought was that there might be a short in my switch board. So I examined that straight away. I rechecked the soldering and the continuity to make sure I hadn't damaged the board. All that seemed to be okay, so I decided to re-do the functional testing just to make sure. But I hadn't got enough time left to do this in this lab, it will have to wait until next week.

Week 9

Week 9 involved further testing of the boards. First up was a power pin test. With no IC's in the boards and the power at 5V connected, all power pins on the board were checked for 5V using a multimeter. This was a straightforward test and caused no difficulty, all boards passed.

Next up was a functional test. First I  connected the mux and switch board together using the 18 pin connector and some ribbon cable. Once connected I examined the ribbon cable to make sure the connection looked okay. The resistor packs were rechecked to make sure they are correctly soldered onto the board. I then checked pin 1 and pin 10 on the swicthboard to make sure they were tied to the mux board with ground and 5V respectively.

Everything seemed fine and I was ready to continue with the functional test. With the power connected to the multiplexer board, a square wave at 1kHz was put through the parallel port connection at pin 1 using a signal generator. Pin 2 of the parallel port was tied to the power to set the counter. This signal was monitored using an oscilloscope. A second signal was monitored using the oscilloscope to check the wave form on the nand gate on IC5 and the wave forms on different pins on the counter, to make sure that the waves were correct, keeping in mind what they should be with respect to the original signal. Everything checked out okay.
Functional test setup
Next the signal generator was connected to Q3 on the counter and the wave forms on the different pins of the multiplexer were tested. The switchboard was needed for part of this to help test the pins from the multiplexer connected to the switches. When a switch was pressed a wave was recorded on the multiplexers from the switchboard. This also enabled me to tie up which switch was connected to which pin on the multiplexers.

 Finally I checked the switches themselves, by monitoring an outputted wave on pin 3 of the parallel port pressing the switches individually. The pictures below demonstrate the wave form at Q3 on the counter and various switches being pressed. Eventually, everything worked out as it should . I say eventually because I had a lot of difficulty doing this test. Basic errors being the most part of these difficulties. It was very easy to mix up which pin was being tested which was sometimes confusing and frustrating not getting the results you were expecting, only to go back and find that you were testing the wrong pin. It was sometimes difficult to get a clear signal on the oscilloscope and involved a lot of configuration. Also, there was at times a lot of noise interference, probably resulting from the amount of wires I had crossing over one another during testing. All in all, I'm glad that's over. The board testing is completed, moving on to software next week.


Pic represents a switch being pressed


Pic represents a switch being pressed


Pic represents a switch being pressed, also demonstrates some noise interference.


Thursday, April 7, 2011

Week 8

This week began testing of the boards. First test was the Visual Check. This involved physically checking the board for any defects, checking for any pins with no solder, any soldered joints that were dry or had a blob or looking for any bridging tracks.
Upon checking, all boards looked fine. There was a bridging track, but that was done purposely. There was also a slight blob, but I decided to leave it alone. It was very slight, I didn't think it would affect the board. Overall, the boards looked satisfactory, further testing will confirm this.
Next up was the continuity test. This involved checking for continuity of signals between each IC and its power or ground connection. In this case, IC's or power was not connected. Using a multimeter the connections to were the pins were going to connect were tested. Making sure that there was a connection and that it was the right one. All the results were recorded, the continuity was fine. Even though this was a simple test, it was long and tedious and took up the rest of the lab time that I had. The picture below is a partial of the recorded results. Next week will involve further testing of the board.

Partial picture of continuity test record.


Thursday, March 17, 2011

Week 7

Not too much to report this week. Continuing from last week I finished drilling the switch board. Slight problem with a blunt drill bit that was burning the board. After replacing that, the drill did slip a bit giving me an unwanted hole in my board. Luckily it won't effect the board.
After this I continued to solder all 3 boards. The greatest difficulty was the switch board's actual switches. It was difficult to accurately line them up and solder them straight. There is some discretion between the switches. But I'm happy with the end results of all 3 boards. Visually there doesn't seem to be any problems, possibly too much soldering causing a slight blob, other than that, all connections look fine. Attached below are pictures of the results, front and back. Next week moves onto the testing of the boards.

Soldered multiplexer board
 

Soldered Switch board

Soldered ADC board


Friday, March 11, 2011

Week 6

Precious little time available in the lab this week, so I went about creating a new switch board straight away. I followed the same procedures as before as my initial switchboard came out fine from the chemical tanks last week. The only problem was that the tanks had to heat up and my board had to be left in the etching tank for 60 minutes. It was a little frustrating, so not to waste any time, I started soldering parts onto my ADC board. Going back and forth to the etching tank to check on my board, I accidentally soldered one of my connectors on the ADC board the wrong way round. This had to be removed and re soldered. I eventually got my switch board out of the etching tanks and proceeding tanks and went about drilling it, first taking it soft and gentle with the slight tapping for the indentations for the drilling!! Lab time was up, I got only about a quarter of the way through drilling the board, I will need to complete the drilling next week.

Week 5

This week was further developing the ADC board. Having created the PCB design the board was now ready to be developed. This is done the same way as the multiplexer board. First the exposure in the UV machine, then into the developing tank for 6 seconds. Then on to the Etching tank. As per usual the etching tank took longer than it should. Considering it is a single sided board, and there was a lot less copper to be removed, it still took 30 minutes. The photoresist stripping and tinning went as planned. I was happy enough with the result, the thinning looked dull in some places but the design seemed solid.
The next step I took was to make the Switchboard PCB so that I could drill and solder all the boards together. We were given the design of the switch board, I just followed the same procedure as before with the chemical tanks the results were good. The resulting board being the best board to date.
Next up was the drilling. I started with the switch board. Firstly you tap were its to be drilled to create an indentation so that it will prevent the drill from slipping. Unfortunately, I was a bit heavy handed with the tapping and applied too much pressure on the board marking the indentations a lot more than needed. I then drilled the board using 0.8mm and 1mm drill bits were needed. Because of the heavy tapping on the board, the drilling started to strip away some of the circuit lines. My hope was to fix this with some soldering. Learning from my mistake, I was a lot gentler with the ADC board, the results were much improved. At this stage we were given a manufactured multiplexer board, so there was no need to drill my one.

Pic1: Damaged switchboard
 Soldering next, and this is were things started to go wrong. With the time nearly up in the lab, I tried desperately to rescue my switch board to no avail. I couldn't reconnect the damaged circuitry and I even burned the board with the soldering iron. Having being my best board from the chemical tanks, I've now managed to destroy it with hammering and soldering, see pic1. I then decided to remake a switch board, but that will have to wait until next week.

Friday, February 25, 2011

Week 4


ADC schematic

Week four is similar to the first 2 weeks. I had to transfer a schematic of a a ADC board to my own schematic using CADSTAR software, then design a PCB schematic. The only difference in designing this PCB was that it was a single sided board. Keeping this in mind, I layed out the components on the board as approbiately as I could. Vitrually wiring all the components was a little tricky because of this being a one sided board as the wires could not overlap. I had to remove alot of wiring and try different approaches numerous times.

 Having completed the schematics and designs, I printed the PCB design out onto some translucent paper in order to transfer the design onto actual PCB board.

Cadstar PCB design                Printout of the PCB design

 I'm now ready to start manufacturing the actual board next week.

Thursday, February 17, 2011

Week 3

Multiplexer PCB design print out, front and back

Having completed the PCB design for the multiplexer using CADstar software last week, I've printed out the design onto translucent paper in order to transfer the design onto PCB board. To transfer the design onto the PCB, the translucent paper was placed over both sides of the PCB and placed into a UV machine for 3 minutes. It's then placed into several tanks containing chemicals to etch out the design onto the PCB.

The tanks are as follows:
  • Developing -> 10-12 seconds
  • Etching -> 15 minutes
  • Photoresist Stripping -> 1minute
  • Tinning -> 10-12 minutes
Using the tanks I encountered some problems. In the developing tank which uses an acid, it's recommend to leave the PCB board in it for 10-12 second. If you were to leave the PCB in the tank for too long it effects the overall result. Because the chemicals in the tanks were relatively new, the PCB only needed to be in the tank for 5-6 seconds. I had left mine in for 8. After examining the board, although the results were not great, I considered them ok to proceed.


Outcome of the bottom of the PCB

The next problem I then encountered was with the etching tank. This strips away all the excess copper from the PCB. Again, if you leave it in for too long it can strip away too much. The problem I had is that it seemed to strip away at one side quicker than the other. I tried to solve this problem by rotating the board, causing this proceedure to take up to 20 to 25 minutes to complete. Nearly ten minutes more than the recommended time. Once again, I examined the board and considered it okay to proceed to the next stage.

The final two tanks were straight forward and caused me no problems. The final outcome of the PCB seemed to be relatively alright. I could trace all the circuitry lines, although they were thin at some points, there were no gaps. The only problems I could see on the board was that the outline of the drill holes were very vague. But this shouldn't be a problem if I just take my time and great care when it comes to drilling the board. I still had the design on paper and could easily mark out the holes to be drilled using a pencil.

The next step in this project is to design an ADC board that will eventually be attached above this board. This will be done similiarly to how the multiplexer PCB design was done.


Friday, February 11, 2011

Week 1-2


Picture of my schematic

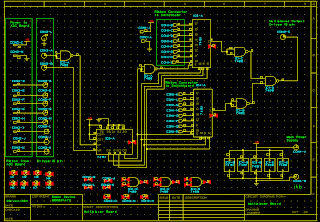
For the first two weeks I had to transfer a schematic of a multiplexer board to my own schematic on the PC using CADSTAR software. I then had to transfer my schematic to a PCB schematic. This is also done using CADSTAR as a virtual board. I placed each individual IC were I thought would be appropriate positions. I also had to take into account that another PCB board will be placed above this one, so I tried to avoid placing any ICs underneath were this board would be placed. This was made easier by having the dimensions of each board and were the second board will need to be placed.

Picture of my PCB schematic

Following this, I now had to virtually wire all the components. This was long and tedious as I was trying to separate the wiring and leave sufficient gaps as to not overlap or have problems drilling the PCB later.
After this was completed, I then mitred the PCB to tidy up the wiring. After mitre I rechecked the board, altering any wiring I felt was to close to each other.
I am now ready to print these schematics and prepare for designing the actual PCB board.